Table of Contents
- Disclaimer
- References
- Story Behind This Thing
- Pros & Cons
- My Setup
- Prerequisites
- Script to Install
- Procedure (Preparing VM)
- Procedure (Tweaking VM)
- Finalize
Disclaimer
You are completely responsible for your hardware and software. This guide makes no guarentees that the process will work for you, or will not void your waranty on various parts or break your computer in some way. Everything from here on out is at your own risk.
This tutorial is for laptop that iGPU is still connected to External Monitor/Dummy HDMI. If your laptop’s dGPU connected to External Monitor/Dummy HDMI, this tutorial is not for you.
References
- https://lantian.pub/en/article/modify-computer/laptop-intel-nvidia-optimus-passthrough.lantian/
- https://github.com/joeknock90/Single-GPU-Passthrough
- https://gist.github.com/Misairu-G/616f7b2756c488148b7309addc940b28
Story Behind This Thing
I’m using gaming laptop with linux for working but I still want to be a “gamers”. There’s some limitation when I gaming in Linux especially the Anti Cheat that cannot be used with Proton. The same goes for productive apps like Adobe Premiere/After Effect or Microsoft Office that 100% not compatible with Wine.
“Why not dual boot?”
- I must re-sync all the clock system in Windows and Linux when I’m switching the OS.
- I must install the same app that I’ve use in Linux to Windows just for communication. Like Discord for gaming.
- This nerd blood is too strong in me…
Pros & Cons
For pros:
- Could be faster than dual booting (this is true in my case, it’s depends on your system).
- You have ability to switch mode to Hybrid (Optimus) and Integrated (Isolated) with a single command line.
- Using virtual disk, you can bring it all the way.
virt-managerrunning without sudo like the other tutorial.
For cons:
- This method using preallocated qemu-img that consume a bunch of storage for a better performance.
- You still have to reboot your laptop to switch your GPU.
- You’ll need to change some source code from
envycontrol.
My Setup
For this tutorial, I’m using MSI Katana GF66 11UD with MUXless scheme and using EndeavourOS Galileo distributon. For the specs, you can search it in internet.
Prerequisites
- A laptop that can support VT-d/VT-g. Some Intel processor above 7th Generation have this feature.
- Enable the Intel Virtualization in BIOS first before start geeking.
- Installing QEMU with virt-manager. You can follow this tutorial for the step of installation.
- Optional. Install QEMU Hooks for binding hooks.
- virtio-win drivers and guest tools. I suggest you to download the ISO file.
- IDDSampleDriver from ge9. Or wait for Looking Glass make their IDDDriver for safety, ofc.
- Looking Glass, for better gaming.
- Optional. Windows File System Proxy to connect your local drive to the VM.
Script to Install
This is for self reminder because I’m always forget what should I’ve install on it.
pacman -S qemu-full virt-manager virt-viewer dnsmasq vde2 bridge-utilsProcedure (Preparing VM)
Enable Intel IOMMU and Load VFIO Modules
- Modify your kernel parameter (usually in
/etc/default/grubif you using GRUB), and add:
intel_iommu=on iommu=pt kvm.ignore_msrs=1Don’t forget to update your GRUB after modify your kernel parameter.
- Add this module to your initramfs: (in my case, I’m using dracut that location in
/etc/dracut.conf.d/)
add_driver+=" vfio vfio_iommu_type1 vfio_pci vfio_virqfd "Don’t forget to update your initramfs after adding some module.
- Restart your laptop.
Disable NVIDA From Accessing X-Server
- Check your GPU. You can use
lspci -nnk | grep -i nvidiato check if your GPU is still be used by Nvidia/Nouveau module. - Copy all envycontrol setup.py code to your laptop.
- Search this line of code:
    if graphics_mode == 'integrated':
        cleanup()

        # blacklist all nouveau and Nvidia modules
        create_file(BLACKLIST_PATH, BLACKLIST_CONTENT)

        # power off the Nvidia GPU with udev rules
        create_file(UDEV_INTEGRATED_PATH, UDEV_INTEGRATED)

        rebuild_initramfs()
Give the command that generate file to power off the Nvidia GPU because we still need to use the GPU. The code will look like this:
    if graphics_mode == 'integrated':
        cleanup()

        # blacklist all nouveau and Nvidia modules
        create_file(BLACKLIST_PATH, BLACKLIST_CONTENT)

        # power off the Nvidia GPU with udev rules
        #create_file(UDEV_INTEGRATED_PATH, UDEV_INTEGRATED)

rebuild_initramfs()- [OPTIONAL, if you using Dracut] search this line of code:
def rebuild_initramfs():
    # Debian and Ubuntu derivatives
    if os.path.exists('/etc/debian_version'):
        command = ['update-initramfs', '-u', '-k', 'all']
    # RHEL and SUSE derivatives
    elif os.path.exists('/etc/redhat-release') or os.path.exists('/usr/bin/zypper'):
        command = ['dracut', '--force', '--regenerate-all']
    # EndeavourOS with dracut
    elif os.path.exists('/usr/lib/endeavouros-release') and os.path.exists('/usr/bin/dracut'):
        command = ['dracut-rebuild']
Change and operator to or in EndeavourOS with dracut because the tools wont execute the dracut-rebuild if you’re using dracut without using EndeavourOS distribution.
- Copy or make symlink to
/usr/binand execute this command:
sudo envycontrol -s integrated- Reboot your laptop, check your GPU with
lspci -nnk | grep -i nvidia. It should your GPU not using nvidia kernel module anymore.
Note: If you want to back to Hybrid mode, just execute this command again:
sudo envycontrol -s nvidiaAnd make it sure your GPU using nvidia kernel after rebooting.
Note2: Check this out, maybe you can follow my lazy ideas.
That’s it!
You can install your Windows in normal way. After that, we can move to the next chapter.
Procedure (Tweaking VM)
After installing your Windows, now we need to make it “like baremetal” for better gaming experience.
SPICE & Virtio Guest Tools
After you install VM. Don’t forget to install virtio-driver and spice-guest-tools for better VM QoL.
Switch your video from Bochs/VGA to QXL and display server from Virtio to Spice server.
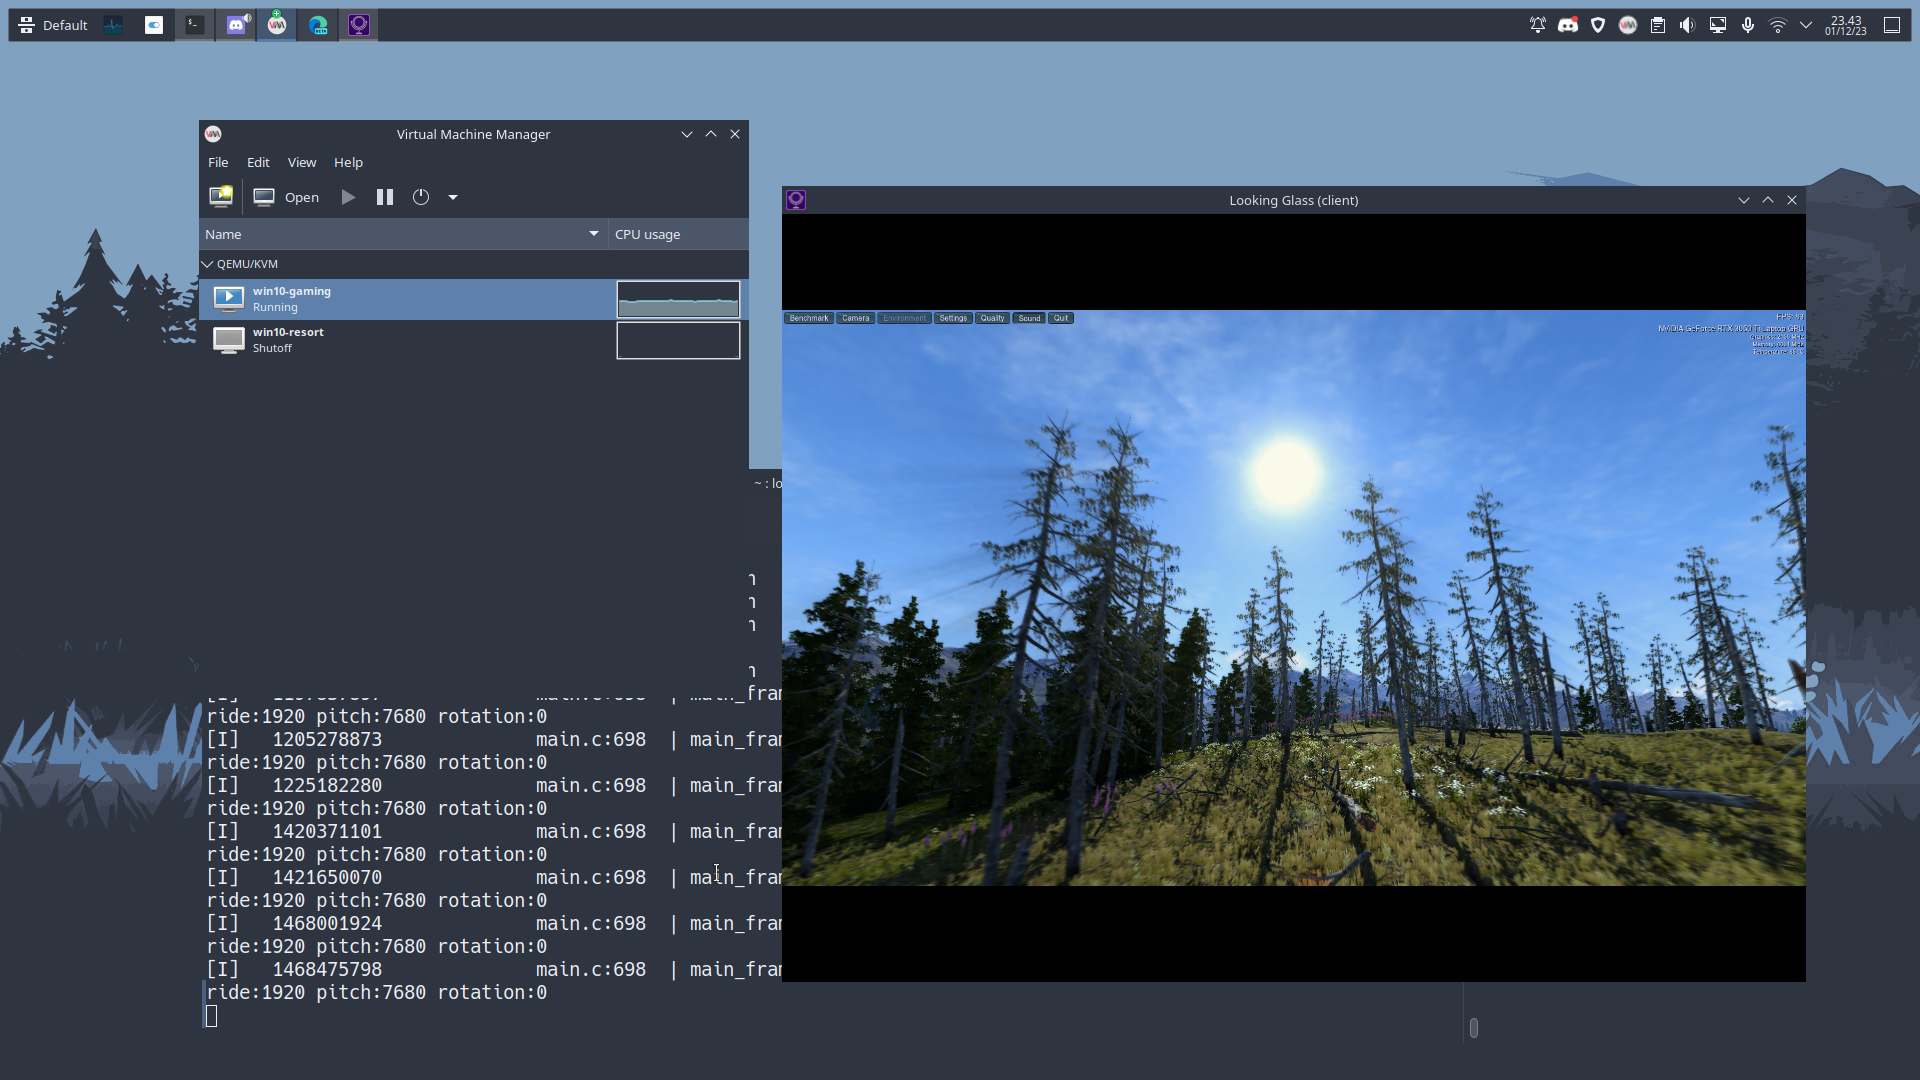
Installing Looking Glass
You can follow the installation for setup IVSHMEM and KVM Permission from Looking Glass wiki here. Here’s some arguments reference to launch looking glass with my scheme:
<!--> Set this above <devices> tag <-->
<shmem name='looking-glass'>
  <model type='ivshmem-plain'/>
  <size unit='M'>32</size>
</shmem>
# /etc/tmpfiles.d/10-looking-glass.conf
f /dev/shm/looking-glass 0660 ikr4m kvm -# Launching Looking Glass with changing ScrollLock button to RightCtrl
looking-glass-client -m 97 -c DXGIInstalling IDDSampleDriver
TODO: Will be changed to Looking Glass way if they’re making the new IDD Driver.
- Save all the folder content on C: because its hardcoded on the driver.
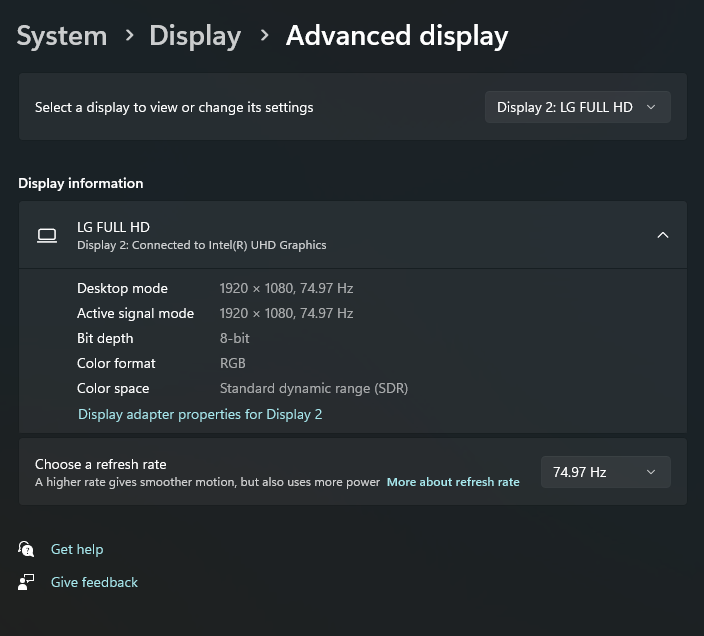
- Modify your
option.txtbased on your monitor and frame rate. You can follow the example from that file and change based on your what monitor do you use.
After that, you can disable your video to None and use Looking Glass to connect to your VM. Don’t forget to change your monitor config.
Audio & Microphone
To enable audio support add a standard Intel HDA audio device to your configuration.
- Search
<audio>tag if exist and modify to this
<audio id='1' type='spice'/>- Add sound model below the audio tag using this
<sound model='ich9'>
  <audio id='1'/>
</sound>
Clipboard
We can use SPICE Server to synchronize clipboard using this configuration
<channel type="spicevmc">
  <target type="virtio" name="com.redhat.spice.0"/>
  <address type="virtio-serial" controller="0" bus="0" port="1"/>
</channel>
[OPTIONAL] VirtIO FS
After installing virtio-driver, add filesystem hardware with virtiofs and specify your location in VM Manager.
Finalize
Go download your favorite game and have fun!